Detailed Craftsmanship
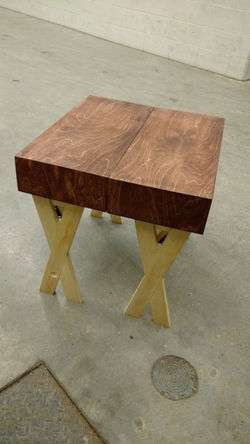
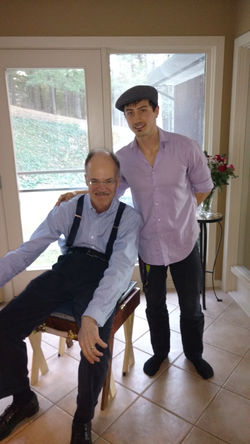 A Very Proud MomentThe image speaks for itself. This is when I finally finished the chair and gave it to the man I built it for. |  Designs Start From SketchesKnowing the constraints and criteria, I made sketches of my ideas. This was a very long process. There were a lot of ideas before I decided on the briefcase style. |  Collapsing MechanismA particularly interesting challenge was ensuring that the legs could withstand lateral force. Inwards force was easy enough to deal with, but how do you prevent them from being pulled outwards? Notice the yellow stiffner in the middle. |
|---|---|---|
 Hook In GrooveThis was one idea. A groove would be cut into the leg. |  HookThe stiffner would then use a hook that slide in the grove so the leg could resist outward lateral force without damaging the hinge on it. | 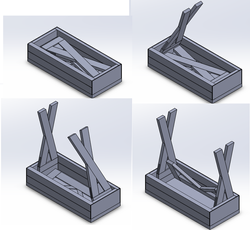 Convenient AssemblyThe chair was designed so that gravity would pull the legs out and things would slide into place. This would allow assembly in any lighting condition and it would make his life easier. |
 Specific RequirementsThe most important feature of the chair was that it was 20 3/8" off the ground since that relieve this man's nerve pain. | 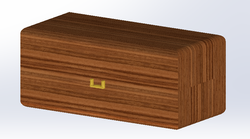 DimensionsThe collapsed chair had to be the size of an airport carry-on. |  Textured Folded |
 Stiffner-Leg LatchSpecial hardware was needed to make the design come together. To make the stiffner-leg latch, I improvised by using hardware designed for shelf assembly. I carved out the catch so it slides in smoothly. |  A Collapsible ChairMake a chair that is precisely 20 3/8" off the ground, easy to assembly, sturdy, and collapses into the size of an airport carry-on. Rest assured, that sounds a lot easier to design that it was--at least it was for me. |  Collapsing Part 1The stiffner folds down first. |
 Collapsing Part 2The legs with the dark stain will collapse first. There are two considerations for this design. The first consideration was to make a visual cue for this--the dark stain. The second consideration was to make this muscle memory, so the first legs to collapse are diagonal from each other. No matter what orientation someone is, it will always be with their left hand close and their right hand on the far side. | 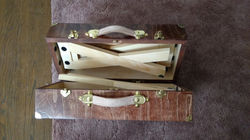 Collapsing Part 3After folding the last leg, the chair simply closes shut. | 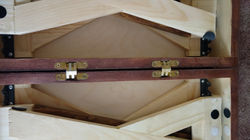 Invisible HingesSpecial hinges were used to make the chair close flush. This was another interesting aspect of design; it can be difficult to find hardware that exists and meets the specifications which are required. The only way I found this was simply by browsing and searching through many catalogs. |
 The Satisfying "Click"There is a latch that will click when it is closed properly. This is a very satisfying feeling and it makes it so the chair can be held together before the latches are engaged. |  Two HandlesTwo handles might seem odd, but it was reasonable to make opening the case easier since the inside latch is fairly strong. |  Testing The ChairBefore giving away the finished product, I needed to test the chair and so I took it with me for a few days with lots of use to see if there were things I had overlooked. |
 A Thorough DesignI could have finished the design a lot sooner, but I was not comfortable putting my name on it unless it was perfect. |  Fixing MistakesA lot of this project was making mistakes and then fixing them. For example, the first time I stained it, I noticed that it made unnoticeable scratches stand out because baltic birch is an open grain and the stain will seep into the scratches. So I sanded it down and restained it. | 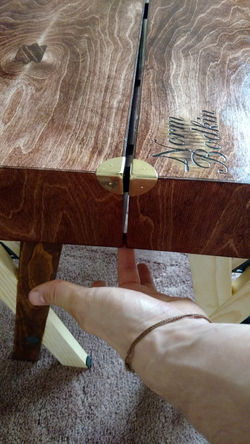 Pinch Points |
 Pinch PointsOccasionally someone will offer to help move the chair. If someone picks it up without thinking there could be some danger with pinch points, but this is not the case here because the legs will prevent this. |  Leg ProtectionThe legs will often knock against each other during set up and so the places of contact were padded to ensure longevity of the device. |  DetailsEvery single detail was considered in this design. Here, I used some shims in order to straighten the leg and make it a little more resistant to collapsing since this leg is supposed to close after the stained one opposite it. |
 Final TouchesThe brass corners on the outside were necessary to protect the chair while placing it on the ground. It weighs 17 lbs, and I'm sure he will want to put it down from time to time without worrying about being gentle about it. |  A Finished ProductIt was a very satisfying thing for me to just look at what I created. |
Medical Chair
2015
I received the opportunity from a professor of mine to build a chair for a man with a disability. I jumped at the chance. In retrospect, I had no idea how much work I was getting myself into. I could have saved a lot of time by making something simple, but with a disregard for quality and aesthetics; I simply couldn't do that. So I took the time to consider every detail. After I built it, I took it with me for a few days to use it and try to find things which I did not already consider.
The design requirements were simple. The device has to stand 20 3/8" above the ground. It has to fit in the dimensions for an airport carry-on. It also had to be easy to assemble in low-lighting conditions. The final design should also be under 20lbs.
I believe I achieved everything I set out to do for this design. The first picture speaks for itself.